

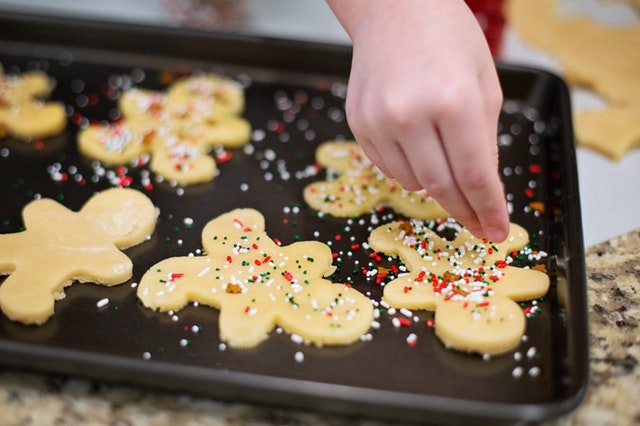
It’s the most wonderful time of the year! It’s time to blare the Christmas music, deck the halls, drink all the hot chocolate, and bake all the sweets. Wondering how you can get the kids in the kitchen during the holidays to bake all the sweets with you? Here are a few pointers to help make some memories with the kids this holiday season with some easy and kid-friendly recipes.
Are you still not convinced on inviting the kids in the kitchen with you on this adventure? We all know what kids in the kitchen can bring…..yes, it’s messy and maybe a bit chaotic. It can take you about three times as long to bake one batch of cookies; but knowing that the children will have a blast and the memory of spending time making a treat in the kitchen with their favorite person makes every “sweet Jesus what have I done?!” moment worth it.
So, before I share with you my top three kid-friendly holiday treats, I want to offer this one piece of advice for any nannies or families out there. I was given this advice when dealing with kiddos in the kitchen. You the adult, do all the baking and the child will do all the decorating. Believe me, it brings a lot more peace on earth.
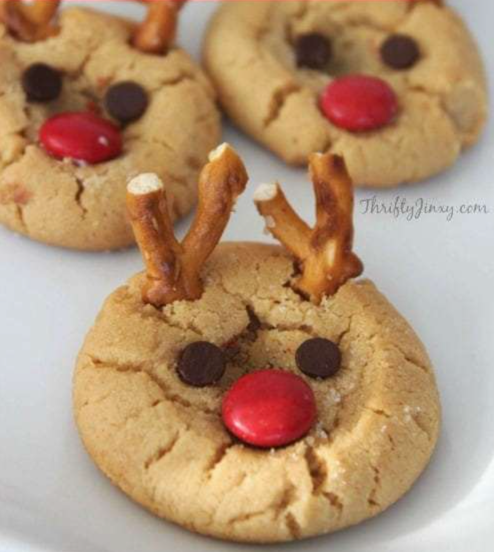
Rudolph Peanut Butter Cookies
Ingredients:
- 1/2 cup Peanut Butter
- 1/2 cup Butter
- 1/2 cup Sugar
- 1/2 cup Brown Sugar
- 1 tsp Vanilla
- 1 Egg
- 1 1/3 cup Flour
- 1 tsp Baking Soda
- 1/2 tsp Salt
- 48 Red M&M’s
- 96 Mini Chocolate Chips
- 48 Mini Twist Pretzels
Instructions:
- Break pretzels into pieces to use as antlers.
- Preheat oven to 350.
- Cream together peanut butter, butter, sugar and brown sugar until smooth.
- Add egg and vanilla and beat until smooth.
- Whisk together flour, baking soda and salt in a separate bowl.
- Slowly add dry ingredients to the creamed mixture, beating until incorporated.
- Roll into 1/2-3/4″ balls and place on cookie sheet several inches apart.
- Sprinkle with sugar and gently make an indentation slightly off the center of each cookie.
- Bake 12-14 minutes.
- Place an M&M in the indentation of each cookie.
- Insert 2 mini chocolate chips (pointy side down) above the M&M to be the eyes.
- Insert 2 pretzel pieces to be the antlers.
- If the antlers won’t stick, place some chocolate chips in a sandwich bag and microwave 30 seconds and knead until soft. Clip the very tip of the corner and pipe onto cookie to act as glue.
Ingredients:
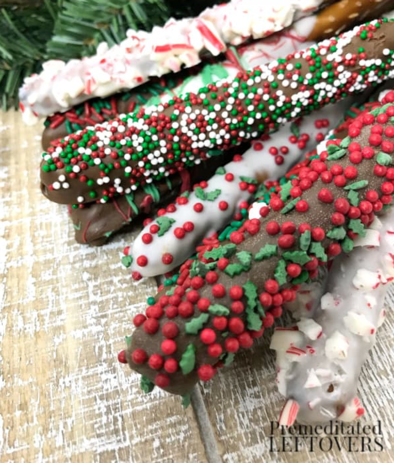
- Pretzel rods
- Brown candy coating, milk chocolate morsels, or chocolate almond bark
- White candy coating, white chocolate morsels, or vanilla almond bark
- Green candy coating
- Red candy coating
- Assorted sprinkles:
- Confetti Holly Mix
- Wilton Holiday Nonpareils
- Wilton Christmas Snowflake Sprinkles
- Crushed peppermint
Directions:
- Melt the candy coating according to package directions giving special care not to overheat the candy. If the candy coating is overheated, it will be too thick. You can add 2 teaspoons of vegetable shortening to help thin the candy but do not add any other type of liquid as the candy will seize and harden.
- Pour candy coating over two-thirds of the pretzel rod and shake gently to remove excess. If applying sprinkles, do so immediately rotating the pretzel rods to coat all sides. Larger sprinkles work best if placed individually.
- Place pretzel rod on waxed paper or cooling rack. (Cook’s notes: Waxed paper makes for easier release.)
- If drizzling with additional colored candy melts, allow initial candy coating to set completely. Then, use a spoon or fork to drizzle candy coating over the pretzel rods. Before the pretzel sets, gently pick it up and move to clean wax paper.
- Let pretzel rods dry completely before packaging or serving.
- Store in an airtight container at room temperature. Placing in the refrigerator may cause the pretzel to soften.
Ingredients:
- 125g butter, melted
- 1/3 cup caster sugar
- 2 eggs
- 1 tsp vanilla essence
- 2 ½ cups plain flour
- 1 tsp of baking powder
- 1 cup Icing sugar (for decorating)
- Marshmallows, mini m&m’s & icing pens (for decorating)
Directions:
- In a large bowl, add melted butter, sugar, eggs & vanilla & whisk until combined
- Stir in flour & baking powder until a soft dough forms. Tip out onto a bench and use your hands to bring it all together. If you are impatient, you can use the dough immediately or alternatively, you can wrap
dough in plastic wrap & freeze for 30 mins. This will make the dough firm and a little easier to work with. - Preheat oven to 200oC Line 2 oven trays with baking paper.
- Roll out dough onto a floured surface approx ½ cm thick. You want the biscuits to be fairly large since you want to give the illusion of a melted snowman on top. Cut circles using the rim of a glass (approx 9cm diameter). Don’t worry if your biscuits are not exactly perfect as you are going to cover the top of them anyway.
- Place on baking trays & bake in preheated oven for 6 – 8 mins or until golden. Remove from oven & allow to cool completely.
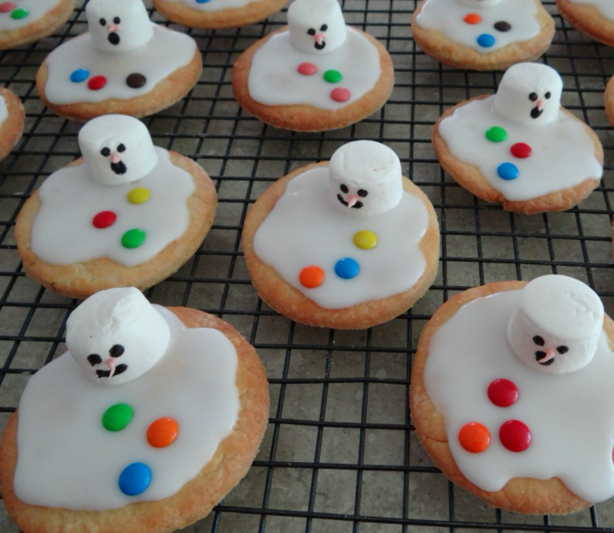
- Using the icing pen, draw little faces on the marshmallows. I used
black pen for the eyes and mouth andpink pen for the noses. You can use one pen for both if you like. For the nose, I slowly squeezed the icing out as I pulled the pen away from the marshmallow to give a 3D effect. - Mix 1 cup icing sugar with 3 tsp water. Stir until smooth. The consistency should be runny but thick enough to spread on the biscuit. Spread on the biscuit to give a melted effect.
- Place the marshmallow face into the icing. Add 3 buttons to each snowman. I used mini m&m’s but you can use whatever you have in the pantry. Set aside for the icing to set.
- Once hard, I then used the black icing pen to draw on the arms. I skipped the snowman scarf as it was an extra step that I didn’t think was necessary and they look great just the way they were. Feel free to add a scarf to your snowmen if you like.
- Stir in flour & baking powder until a soft dough forms. Tip out onto a bench and use your hands to bring it all together. If you are impatient, you can use the dough immediately or alternatively, you can wrap

Happy Holiday baking everyone! I hope you enjoy